Low lighting poses a challenge because because it requires low shutter speeds, and most people cannot hold the camera still enough to have no blur below 1/30 shutter speed, and also, subjects cannot stand still without leaning on something for less than 1/60th of a second.
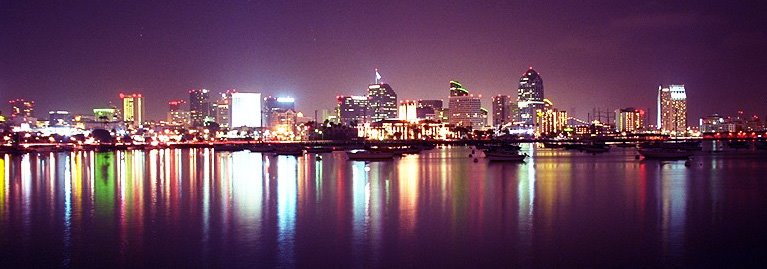
On the other hand, shooting in low light can produce some nice effects. For example, skylines (like the one shown, from Color Spectrum Photography) look best just before sunrise and sunset to make a warm and cozy mood. Also, a lot of real estate photos are taken just before the sun rises to make them look welcoming.
Some Things to do when shooting in Low Light:
1. Keep the aperture wide open and the shutter speed long. Beware of blurring, because of the slow shutter speed. Also, having the aperture too stopped down can result in the star effect, as shown in this photo from color spectrum photograpy So keep the aperture wide open unless you want this effect.

2. Use a fast film. Use a faster film setting than you are actually using. For example, if you are shooting with film with an ISO rating of 100, "push" the film by setting it to ISO 200 on your camera. This allows you to use a faster shutter speed. For example, if your ISO 100 film requires a shutter speed of 4 seconds at a certain aperture, if you set the ISO to 200 at the same aperture, you will only need a shutter speed of 2 seconds. You must do this for the whole roll, however. Be aware the quality will be less, and as it will be grainy, you may not be able to enlarge it so much.
3. Use a spot meter. These are pieces of equipment which gauge the amount of light in different places, since light is often uneven in a low light situation (from a spotlight, or car lights for example) They look like this picture from Robert White.
4. Use a tripod. Obviously.
5. Invest in a fast lens. Theses are lenses whose largest apertures are very large, such as 1.0.
Some Cool effects:
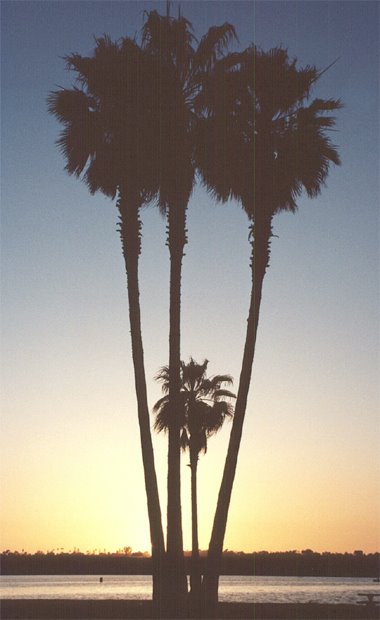
Sometimes a part of the picture can be the light source, illuminating another part of the picture, as in this picture from Roger and France's Low-Light Photography

Or, as in these cases, from
San Diego Club Photography and color spectrum photograpy a light from behind makes the sunject in the foreground just a shadow or a silhouette.

Sun Light
When shooting in sunlight, there are also some things that you have to take into consideration.
Pay attention to where the sun is:
Above:
If the sun is directly above the subject, then it casts strange shadows on their faces, as shown in this example from Geoff Lawrence.com:

In Front:
If the sun is directly in front of the subject, they may squint, which isn't always desired, and also doesn't take full advantage of the sun. Try to place the subject so that the sun is either coming from the side, or from behind.
Behind:
If the sun is directly behind the subject, then you can achieve some nice effects. However, watch out for lens flare, as shown in this example from Cambridge in Colour. Lens flare is caused by a non image forming light source touching the negatives. In this case, the sun pointed directly to the lens. It can also happen with other sources or when the sun is just outside of the frame.

A lens hood can help to lessen lens flare. A lens hood as taken from
Wikipedia looks like this:

Also be aware that a strong sun light from behind will show sometimes unflattering details, like frizzy hair, as in this example from Geoff Lawrence.com

From the Side:
Sometimes it is best to place the subject or angle yourself such that the sun is coming from the side. In this case, from Geoff Lawrence.com, the sun shines from the side, and slightly illuminates one half of the face, but leaves the majority of the subject darker against a well lit background, making him stand out.

Sources:
1. Low Light Photography [http://www.sederquist.com/clanight.html]
2. Clubbing "San Diego Club Photographs" fotog.net/club2/index.htm
3. Pool Players - Roger and Frances Low-Light Photography [http://www.rogerandfrances.com/images/portraits/pool%20players.jpg]
4. Color Spectrum Photography [http://colorspectrumphoto.com/Galleries/galleries.html
5. Spot meters [http://www.robertwhite.co.uk/meters.htm]
6.http://www.cambridgeincolour.com/tutorials/lens-flare.htm
7. http://en.wikipedia.org/wiki/Lens_hood


No comments:
Post a Comment